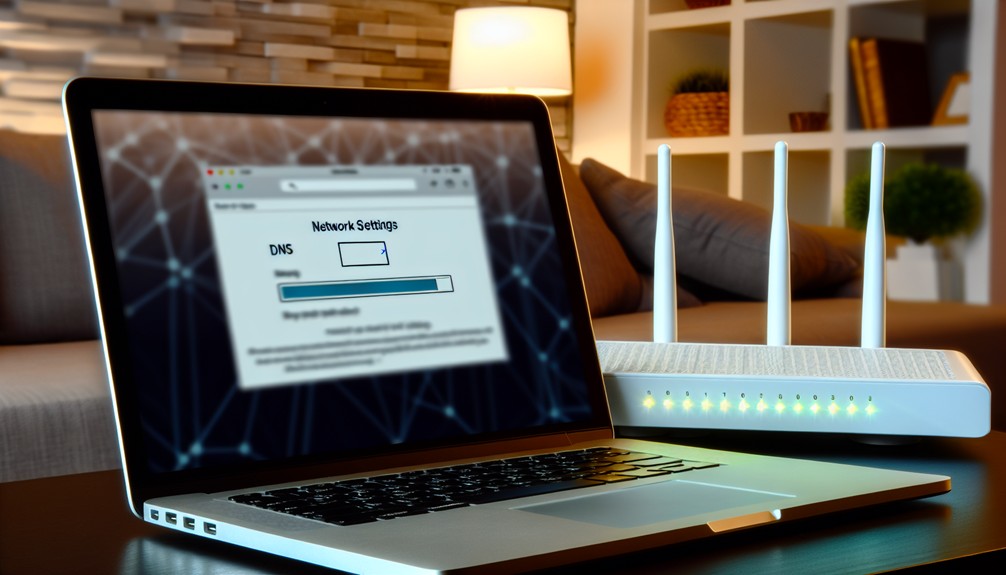
To set up Smart DNS on your home router, first check router compatibility for DNS customization. Choose a reliable Smart DNS provider and sign up. Access your router’s admin interface by entering its IP address in a browser and logging in. Navigate to the DNS settings and replace the default DNS servers with those provided by your Smart DNS service. Save your changes and reboot the router. Finally, test your connection by accessing a region-restricted website and measuring speed. With these steps, you’ll enhance your streaming experience and unlock global content access, while further insights await you.
Key Takeaways
- Verify your router’s compatibility for DNS customization and check for any necessary firmware updates.
- Choose a reliable Smart DNS provider based on pricing, performance, and customer support.
- Access your router’s admin interface and navigate to the DNS settings section.
- Replace the default DNS servers with those provided by your Smart DNS service and save the changes.
- Test your connection by checking access to region-restricted content and performing speed tests.
Understanding Smart DNS

Smart DNS is a powerful tool that many users leverage to enhance their internet experience. Understanding the smart DNS basics is crucial for anyone looking to optimize their online activities.
Unlike traditional VPNs, which encrypt your data and may slow down your connection, smart DNS allows you to reroute your DNS queries without impacting your speed. This means you can access region-locked content efficiently while keeping your connection fast.
However, there are several smart DNS misconceptions that you should be aware of. For instance, some people mistakenly believe that smart DNS provides anonymity and security similar to a VPN. In reality, while it can bypass geo-restrictions, it doesn’t mask your IP address or encrypt your traffic.
It’s essential to recognize these differences when considering your online privacy needs.
To effectively utilize smart DNS, you’ll need to configure your router or device to use specific DNS servers provided by your smart DNS service. This setup enables you to access content from different regions seamlessly.
Benefits of Smart DNS

Utilizing smart DNS can significantly enhance your online experience by providing access to a broader range of content without the usual speed limitations associated with traditional VPNs. One of the primary benefits you’ll notice is speed improvement. Smart DNS allows for geo restriction bypass, enabling you to access region-locked content seamlessly, which is particularly advantageous for streaming enhancement.
In addition to unlocking content, smart DNS offers impressive device compatibility, supporting a wide array of devices from smart TVs to gaming consoles. This means you won’t need to configure each device individually, simplifying your setup process and enhancing your user experience.
Cost effectiveness is another compelling reason to consider smart DNS. Many services offer competitive pricing compared to traditional VPNs, allowing you to enjoy premium content without breaking the bank.
Lastly, while smart DNS doesn’t provide the same level of privacy protection as a VPN, it maintains network stability, ensuring a reliable connection for uninterrupted streaming.
Checking Router Compatibility

Before diving into setting up smart DNS at home, it’s crucial to ensure your router is compatible with this technology. Many router models on the market support smart DNS, but not all do. Start by checking your router’s specifications online or in the user manual. Look for key features such as DNS customization options and whether it enables manual DNS entry.
Additionally, ensure your router’s firmware is up to date. Manufacturers often release firmware updates that enhance functionality and security, which may include improved support for smart DNS. To check for updates, log into your router’s admin interface, usually accessed via a web browser. Navigate to the firmware section to see if you have the latest version; if not, follow the manufacturer’s instructions to upgrade.
If your router doesn’t support smart DNS, consider replacing it with a model that does. Prioritize routers known for their compatibility with various DNS services, as this will simplify the setup process and optimize your experience.
Once you confirm compatibility, you’ll be well-prepared to proceed with the smart DNS setup.
Choosing a Smart DNS Provider

When selecting a smart DNS provider, you’ll frequently encounter a variety of options, each with unique features and pricing structures. Start by evaluating pricing plans; some providers offer tiered subscriptions based on features and geographic coverage.
Look for provider reviews to gauge user experience and service reliability. A well-reviewed service typically indicates a solid choice.
Next, consider performance speed. A provider should offer fast connection times to ensure smooth streaming and browsing.
Device compatibility is also crucial; verify that the service supports all your devices, including smart TVs, gaming consoles, and mobile devices.
Customer support is another vital factor. A responsive support team can make a significant difference, especially if you encounter issues or need setup assistance.
Many providers offer trial periods, allowing you to test the service before committing to a long-term plan. This can help you assess whether the provider meets your expectations.
Ultimately, take your time to research and compare options. Choosing the right smart DNS provider involves balancing pricing, performance, and support to enhance your overall online experience.
Accessing Router Settings

Accessing your router settings is essential for configuring smart DNS and optimizing your network. This process allows you to adjust various settings that enhance both performance and security when setting up smart DNS at home.
Here’s how to navigate your router’s interface effectively:
- Connect to your network: Ensure you’re connected to the router’s network, either via Wi-Fi or Ethernet cable.
- Open a browser: Launch a web browser and enter the router’s IP address in the address bar. Common addresses include 192.168.0.1 or 192.168.1.1.
- Login credentials: Enter your admin username and password. If you haven’t changed these, they’re often found on a sticker on the router or in the documentation.
- Check for firmware updates: Regularly updating your router’s firmware enhances router security and can improve overall functionality.
Once you’ve logged in, explore options such as security settings, which help protect your network from unauthorized access.
Familiarizing yourself with the interface will empower you to make precise adjustments, ensuring a robust and efficient network tailored to your smart DNS needs.
Configuring DNS Settings

Configuring your DNS settings is a crucial step in setting up smart DNS at home. Begin by navigating to the DNS settings section within your router’s configuration interface. You’ll need to replace the default DNS servers with those provided by your smart DNS service. This change significantly enhances your DNS performance and unlocks geo-restricted content.
Pay attention to DNS security; ensure that your new DNS servers support secure DNS protocols like DNS over HTTPS (DoH) or DNS over TLS (DoT). These protocols encrypt your DNS queries, reducing the risk of DNS leaks that could expose your browsing history.
To optimize DNS caching, configure a suitable cache time to improve response times for frequently accessed domains. Once you’ve entered the new DNS addresses, consider implementing a DNS management strategy to regularly monitor and maintain your settings.
This oversight will help you quickly adapt to any service changes or updates. After completing these configurations, you’ll be well-equipped to enjoy a seamless streaming experience while safeguarding your online privacy. Following these steps will ensure you maximize the benefits of your smart DNS setup.
Saving and Applying Changes
After entering the new DNS addresses, it’s crucial to save and apply your changes to ensure they take effect. Failing to do so could leave your router using the old DNS settings, which undermines the benefits of Smart DNS, including enhanced DNS security and faster access to geo-restricted content.
To save and apply your changes, follow these steps:
- Locate the “Save” or “Apply” button in your router’s settings interface.
- Confirm any prompts that may appear, ensuring the new DNS settings are properly registered.
- Reboot your router if instructed, as some router firmware necessitates a restart for changes to take effect.
- Consider checking the firmware version after applying changes to ensure your router operates with the latest security patches and features.
Testing Your Connection
Testing your connection is essential to ensure the Smart DNS settings are functioning correctly. After applying the changes, you need to verify that your device is using the new DNS servers. Start by visiting a website that’s typically restricted in your region. If you can access it, your Smart DNS setup is working as intended.
Next, check your connection speed. Use online speed test tools to measure your download and upload speeds before and after configuring Smart DNS. If you notice a significant decrease in speed, it might indicate an issue with your DNS settings or the service itself.
Additionally, assess DNS security. You can do this by using tools that check for DNS leaks. These tools will show if your DNS requests are being routed through your Smart DNS provider or if they’re leaking through your ISP.
Ensure that your requests are secure; this is crucial for maintaining privacy while streaming.
Troubleshooting Common Issues
When encountering issues with setting up smart DNS at home, it’s important to systematically identify and resolve the problem. Start by checking for DNS leaks, which can reveal your actual location and undermine your geographic restrictions. Use online tools to confirm that your DNS requests are routed through the Smart DNS servers.
Next, ensure device compatibility. Some devices may require additional configuration or may not support Smart DNS at all. Refer to your device’s documentation for specific instructions.
Performance optimization is another crucial area to examine. Slow streaming or buffering can stem from improper DNS settings or server overload. When setting up smart DNS at home try changing to a different DNS server provided by your Smart DNS service.
Here are some common issues to troubleshoot:
- Confirm that the DNS addresses are correctly entered in your router settings.
- Restart your router and devices to apply any changes.
- Clear your device’s DNS cache to remove old records.
- Verify that your Smart DNS subscription is active and not expired.
If you’re using services like Getflix, Smart DNS Proxy, UFlix, SimpleTelly, or Trickbyte, they each provide detailed support documentation and active customer service teams to guide you through these steps. These providers have built their reputation on reliability, so troubleshooting is usually minimal with accurate initial setup.
Maintaining Your Smart DNS Setup
To effectively maintain your Smart DNS setup, you’ll want to regularly check and update your DNS settings, as well as monitor your service performance. Maintaining DNS security is crucial, so ensure your provider updates their DNS servers and implements robust security measures. Performance monitoring is essential; run speed tests periodically to confirm your connection is stable and fast.
Here’s a quick reference table to help guide your maintenance routine:
| Task | Frequency | Purpose |
|---|---|---|
| Update DNS Settings | Monthly | Ensure compliance with service reliability |
| Run Speed Tests | Weekly | Assess performance and identify issues |
| Check Device Compatibility | Quarterly | Ensure all devices support the DNS service |
| Review User Support | Biannually | Evaluate the availability of alternative solutions and assistance |
Premium Smart DNS providers like Getflix, Smart DNS Proxy, Trickbyte, UFlix, and SimpleTelly regularly update their DNS servers and offer newsletters or blog updates to keep users informed. These providers make maintaining your DNS configuration easy and efficient for uninterrupted streaming access.
Frequently Asked Questions
Can I Use Smart DNS on Mobile Devices?
Yes, you can use Smart DNS on mobile devices. It offers benefits like bypassing geo-restrictions, but its limitations include potential issues with certain apps and services that require a full VPN for complete anonymity.
Services such as Getflix, Smart DNS Proxy, and UFlix offer mobile-friendly guides, ensuring you get optimal performance whether you’re using iOS or Android.
Does Smart DNS Work With VPN Services?
Smart DNS can work alongside VPN services, enhancing your streaming experience. However, remember its limitations; while you gain Smart DNS benefits, you might lose some VPN features, like encryption and IP masking, affecting overall security.
Will Smart DNS Affect My Internet Speed?
Smart DNS can enhance streaming speeds by bypassing geographical restrictions, but it might also introduce minor latency due to DNS resolution processes. Weigh the Smart DNS benefits against potential drawbacks to optimize your internet experience.
Is Smart DNS Legal to Use?
Over 70% of users enjoy Smart DNS benefits like bypassing geo-restrictions legally. However, some countries restrict its usage, presenting Smart DNS drawbacks. Always check local regulations to ensure you’re compliant while maximizing your internet experience.
Can I Switch Smart DNS Providers Easily?
You can switch Smart DNS providers easily, but consider the benefits like faster streaming and bypassing geo-restrictions against drawbacks such as potential downtime or compatibility issues. Evaluate your options to ensure seamless transitions.
Conclusion: Choose the Best Smart DNS for Your Streaming Needs
By now, you know more about setting up smart DNS at home, enhancing your streaming experience with ease. It’s almost surprising how simple it was, considering the benefits you gain. With your new setup, you can bypass geo-restrictions and enjoy content from around the world.
Top-rated providers like Getflix, Smart DNS Proxy, UFlix, Trickbyte, and SimpleTelly make accessing global entertainment straightforward and reliable. Whether you’re an everyday streamer or a cord-cutting enthusiast, these Smart DNS solutions offer high-speed performance, stable connections, and excellent customer support.
Just remember to maintain your configuration and troubleshoot any issues as they arise. Coincidentally, your entertainment options just expanded significantly welcome to the world of Smart DNS!

